Showing posts with label shim. Show all posts

Sunday, March 27, 2022

Tilt


Indoor Sunday. Nothing to buy because there's no money to buy it with. Managed to re-string this guitar.


Before that happened, managed to give it a shim. Used a leftover DiMarzio inlay card. This was chosen for its thickness; nothing too extreme. If you read around, luthiers recommend a cigarette box but I find it a little too excessive. This card is thinner. You only need to shim the neck pocket if the action past the 12th fret is a little too high after you finished setting the string action up. Modern Fenders will have a neck tilt adjustment feature at the neck pocket area so shimming is unnecessary.


Before fixing the neck back into the pocket, I always powder the sides so that there's less resistance, forcing the neck into the pocket might cause the thin parts of the pocket wall to crack.

Thursday, July 8, 2021

Knobs


Once again, a totally unnecessary mod but a happy one for me. New knobs for my Kiesel Holdsworth. There were red ones in there previously but I prefer these instead as they are more pinkish. 


This was what took place every time knobs are replaced. It's bordering on being OCD but I'll share anyway. I have this shim / wedge that I place before installing the knob. As you can see, it's made from  a trashed warranty card pieced together using sticky tape. Two layers of card material were used to give a certain clearance off the body surface.


Once the knob is in place & sits on the shim, it is locked & the shim duly removed. The reasons for doing this: 1) It provides a uniform clearance for a knob off the guitar body. We do not wish for it to be touching the body surface because it will scratch it when in use. If it sits too high, it affects effective handling. 2) It prevents us from doing a precarious balancing act while locking the knob in place. 

This is, of course, totally unnecessary & a newbie-like approach to a simple task. I'm used to this & it has its benefits. If you are a master knob installer, good for you. I stick to what works for me.

Saturday, December 1, 2018

Shimming tutorial (sort of)


Greetings, folks. I would like to begin December with this sharing because it's something you can DIY at home without bringing it to a tech & getting charged for it. This is a simple shimming exercise using materials/ tools which a non-tech can handle. To begin with, the shim material I'm using is a left over package inlay from a Seyour Duncan pot. The reason for using it- it's a thin material & chances are, you can double/ triple ply it to suit your needs as opposed to starting with a thick material & facing problems of subtraction to make the material thinner.


If you intend to keep the current strings while shimming takes place, use a capo to secure loose strings before removing the neck from the body. Of course, detune your strings first. 


Cut out the shim to shape as depicted above. In this instance, I'm using a double ply. What you see there is a piece which had been folded into 2 parts. Make sure the shim material does not move once neck re-attachment takes place. If it does, hold it down with a weenie bit of paper glue. Leave it to dry before returning the neck to where it belongs.


It is my personal habit to powder the sides of the neck so that re-attachment is smooth.


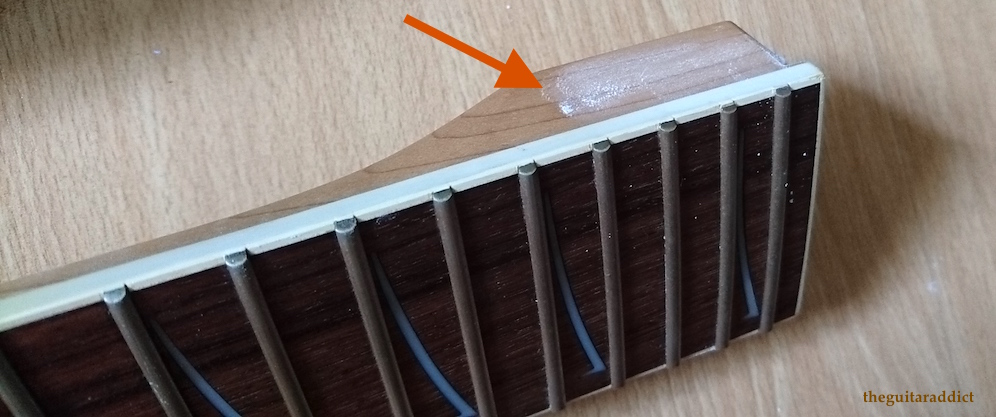
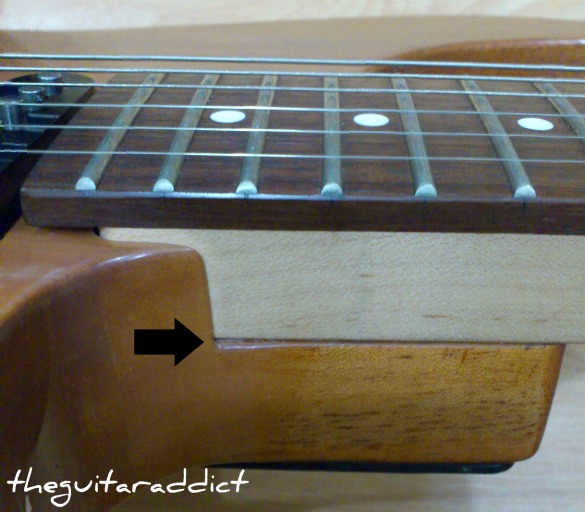
After re-attachment, this is what you should look out for- a leveraged neck end. Please observe slight increments in height. More importantly, your strings should be parallel to the fretboard (I've included the strings here for a clearer reference). 


Alright! Good to go! Why is shimming required?
  • The inner cavity of the body's neck pocket might be routed a little too deep. Factory hands won't flag this as an anomaly unless the depth is excessive.
  • When you tighten the neck screws, softer body wood would compress & this is especially true if wood is not throughly dried before manufacturing takes place
  • You switched to a thicker string gauge set & increased the tension of the neck. This tension causes a further downward pressure at the cavity end & guitar necks would sink in after some time. This is again compounded by the body's soft wood material/ lack of proper drying.
Wishing everyone a good December ahead. Year end mood is kicking in. Slowly but surely. 😎

Tuesday, October 9, 2012

Set up: Ibanez SR bass

This is an Ibanez SR bass, passed to me for some looking into. The primary instruction was to address the default action which was a little too high, made playing difficult. My first diagnosis- the bass sports the wrong neck tilt. Upon removal, the neck had a shim to address this concern, I had no idea if it was factory-default or inserted by the previous owner.

Since this was insufficient to address the situation, the neck pocket in the body was shimmed as well.

Monday, December 26, 2011

Ibanez: Halberd (Part 5)

I've talked about shimming & neck tilt recently & my Ibanez Halberd here obviously has a tilted neck. The evidence is rather clear from the pic above. Will check for any shimming done to this guitar on its next string change.

Thursday, December 15, 2011

Shimming notes (Part 3)

So the compromised shim in the previous episode was detached from the neck's pickup-end base, a replacement shim was made using an unused portion of a guitar string box & inserted into the area depicted above. I usually ensure at least 1/4 of the pocket surface is covered for a marked effect. The corners of the shim were rounded for a snug fit. 

When the neck was re-attached to the body pocket, the effect of the shim can be seen here; there's a little gap as indicated above. Despite the shim being rather thin to many of us, it's more than enough to wedge the neck up. The neck needed a wee bit of wedging material to generate enough angular effect to rectify the action settings. It's like prescribing a small dosage of medicine to cure a person, regardless of how big the person is.

Why is shimming necessary? 
You did well in setting up your guitar; the neck had been straightened or bowed adequately according to your personal preference, the action had been checked to your specs but upon playing, you feel that the action at the upper frets are disproportionately higher than the rest of fret areas. 

Why does this happen?
It's not your fault. Either the body's neck pocket cavity had been routed a little too deep or the neck itself had been cut/ sanded down too much. It could also be the bridge's fault; at its lowest setting, it still inclines the strings too much at the upper fret areas (assuming there are no issues with the body's cavity & neck).

Some upper tier guitars feature a neck tilt mechanism to address this issue like the Fender you see above. All you need to do is insert the allen wrench provided & adjust the neck inclination accordingly.

Wednesday, December 14, 2011

Shimming notes (Part 2)

This is the neck of my Jackson JS-20, I recently removed it to check if there was any shimming done because I felt/ observed the neck wasn't sitting too well in the body pocket. I was right, they shimmed it but look at what was used for the task- a discarded sand paper...

To get the thickness right, they even folded the paper into half... There's a simple reason why this failed, not because of the paper's thickness, but look at its alignment; it's sitting too much on the left. *Duh*

Sunday, October 26, 2008

Shimming the neck (Part 1)

Today I shimmed the neck of my H1 Tele not that it's in a dire need of one but it's my attempt to enjoy a uniformed (lower) string action along the neck of the guitar. In reality, this is nigh on impossible because the nature of the instrument is such that the lower fret register would manifest a lower action (once the strings are fretted) compared to the upper upper part. If action is uniformed throughout, there will be fret buzzing.

What in guitardom is a shim? It's a wedge inserted in the guitar body's neck pocket to raise the neck placement.

The neck of the H1 Tele is first removed. If your body's neck pocket contain some dirt/ dust, it's best removed/ swept away before proceeding. As you can see here, Fender still stamps some assembly detail in their neck pockets as it was done in the past. My H1 tele is indeed a fresh product, assembled in July this year.

Create a simple shim out of a piece of paper. The recommended thickness is one similar to that of a cigarette box. If you don't smoke & having fag boxes in the house would get you into grave trouble, use a food container box (eg: cereal box/ granola bar box/ etc) or your string pack (the one I used here) for that matter. The length of the shim should match that of the pocket (duh!) but the width need only be 2cm or lesser. The objective is to raise the tip of the neck, nothing excessive.

You need not create any holes on the shim (because as you screw the bolts back in, they would easily penetrate the paper, yes?) but I did that to ease insertions.

Righty! It's done! My H1 tele needs a fresh set of string & I'm using EHX's set of .009 this time...